
Why Your Kitchen Tap Won’t Swivel: A Comprehensive Guide to Fixing a Stuck Handle
Is your kitchen tap handle refusing to budge? A stiff or completely stuck swivel handle is a common kitchen frustration, but often solvable with a bit of know-how. This comprehensive guide will walk you through the most common causes of a kitchen tap handle that won’t swivel, providing step-by-step troubleshooting and repair solutions. We’ll cover everything from simple fixes you can do yourself to when it’s time to call in a professional plumber. Our aim is to equip you with the knowledge and confidence to get your tap working smoothly again.
Understanding the Mechanics of a Swivel Tap
Before diving into troubleshooting, it’s helpful to understand how a swivel tap works. Most kitchen taps feature a rotating spout that allows you to direct the water flow across the sink. This swivel action is typically facilitated by a series of O-rings or seals within the tap body that allow the spout to rotate smoothly while maintaining a watertight seal. Over time, these components can degrade, become clogged with mineral deposits, or simply dry out, leading to a stiff or seized swivel.
Common Causes of a Stuck Swivel Handle
- Mineral Buildup: Hard water contains minerals like calcium and magnesium that can accumulate inside the tap, particularly around the O-rings and swivel joints. This buildup restricts movement and can eventually cause the handle to seize completely.
- Corrosion: Over time, corrosion can develop on the metal components of the tap, especially if you have older plumbing or are using harsh cleaning chemicals. Corrosion can bind the moving parts together, making it difficult to swivel the handle.
- Dried-Out O-Rings: The O-rings that provide a watertight seal for the swivel spout can dry out and become brittle over time. This lack of lubrication increases friction and makes the handle harder to turn.
- Debris and Sediment: Small particles of debris, sediment, or even rust from your plumbing system can get lodged in the swivel mechanism, obstructing movement.
- Improper Installation: In some cases, a poorly installed tap can have a handle that is stiff from the start. This could be due to overtightened connections or misaligned parts.
Troubleshooting a Kitchen Tap That Won’t Swivel
Now, let’s get into the practical steps you can take to diagnose and fix your stuck tap handle.
Step 1: Identify the Type of Tap
Different types of taps have slightly different mechanisms. Common types include:
- Mixer Taps: These have a single lever or two handles that control both hot and cold water.
- Pillar Taps: These have separate taps for hot and cold water.
- Pull-Out/Spray Taps: These have a spout that can be pulled out for rinsing.
Knowing your tap type will help you understand its construction and how to access the swivel mechanism.
Step 2: Inspect the Tap for Obvious Issues
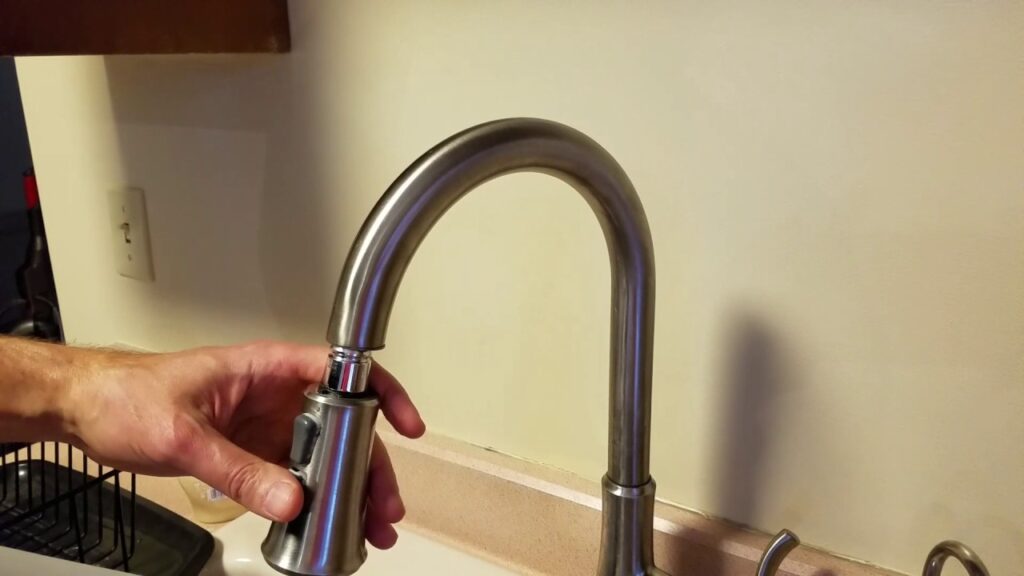
Visually examine the tap for any signs of damage, corrosion, or mineral buildup. Look closely at the base of the spout where it joins the tap body. Is there any visible white or green residue? Is the metal pitted or discolored?
Step 3: Try Gentle Force (With Caution!)
Try gently wiggling the handle back and forth, applying a small amount of pressure. Do not force it! Excessive force could damage the tap or break internal components. The goal is to see if you can loosen any minor obstructions.
Step 4: Apply Lubricant
A penetrating lubricant can often free up a stuck swivel. Here’s how to apply it:
- Turn off the water supply: Locate the shut-off valves under your sink and turn them off.
- Protect the surrounding area: Place a towel or cloth around the base of the tap to catch any drips.
- Apply the lubricant: Use a spray lubricant like WD-40 or a silicone-based lubricant. Apply it directly to the base of the spout where it joins the tap body. Try to get the lubricant to penetrate into the swivel mechanism.
- Wait: Allow the lubricant to sit for at least 15-20 minutes. This gives it time to penetrate and loosen any buildup or corrosion.
- Try again: Gently try to swivel the handle again. If it’s still stuck, repeat the lubrication process and wait longer.
Step 5: Disassemble and Clean the Tap (If Comfortable)
If lubrication doesn’t work, you may need to disassemble the tap to clean the swivel mechanism. This step requires some DIY skills and caution. If you’re not comfortable with plumbing repairs, it’s best to call a professional.
- Turn off the water supply: As before, turn off the water supply to the tap.
- Disconnect the water lines: Use a wrench to disconnect the hot and cold water lines from the tap. Have a bucket ready to catch any residual water.
- Remove the tap from the sink: Depending on the tap model, you may need to loosen screws or nuts to remove it from the sink.
- Disassemble the swivel mechanism: Carefully disassemble the tap, paying attention to the order of the parts. Take pictures as you go to help you reassemble it correctly.
- Clean the parts: Use a mild cleaning solution and a soft brush to clean all the parts, removing any mineral buildup, corrosion, or debris. Pay special attention to the O-rings and swivel joints. You can soak the parts in vinegar to help dissolve mineral deposits.
- Replace O-rings (if necessary): If the O-rings are cracked, brittle, or damaged, replace them with new ones of the correct size. You can find replacement O-rings at most hardware stores.
- Lubricate the parts: Before reassembling the tap, apply a silicone-based grease to the O-rings and swivel joints. This will help them move smoothly and prevent future problems.
- Reassemble the tap: Carefully reassemble the tap, following the pictures you took during disassembly.
- Reinstall the tap: Reinstall the tap in the sink and reconnect the water lines.
- Turn on the water supply: Slowly turn on the water supply and check for leaks.
Preventing a Stuck Swivel Handle in the Future
Once you’ve fixed your stuck tap handle, it’s important to take steps to prevent the problem from recurring.
- Regular Cleaning: Clean your tap regularly with a mild cleaning solution to remove any mineral buildup or debris.
- Lubrication: Periodically lubricate the swivel mechanism with a silicone-based grease. This will keep the O-rings from drying out and prevent the handle from sticking.
- Water Softener: If you have hard water, consider installing a water softener to reduce mineral buildup in your plumbing system.
- Avoid Harsh Chemicals: Avoid using harsh cleaning chemicals on your tap, as they can damage the O-rings and other components.
Choosing the Right Lubricant for Your Kitchen Tap
Selecting the appropriate lubricant is crucial for maintaining the smooth operation and longevity of your kitchen tap. Not all lubricants are created equal, and using the wrong type can actually cause more harm than good. Here’s a breakdown of what to look for:
Silicone-Based Grease: The Preferred Choice
Silicone-based grease is generally considered the best option for lubricating kitchen tap components, particularly O-rings and swivel joints. Here’s why:
- Water Resistance: Silicone grease is highly water-resistant, meaning it won’t wash away easily with water exposure. This is essential for maintaining lubrication in a wet environment like a kitchen tap.
- Compatibility with Rubber and Plastics: Silicone grease is compatible with most rubber and plastic materials commonly used in tap construction, including O-rings, seals, and washers. It won’t cause these materials to swell, degrade, or become brittle.
- Temperature Stability: Silicone grease can withstand a wide range of temperatures without losing its lubricating properties. This is important for taps that are exposed to both hot and cold water.
- Non-Toxic: Food-grade silicone grease is non-toxic and safe for use in contact with potable water.
Avoid Petroleum-Based Lubricants
Petroleum-based lubricants, such as WD-40 (despite its common use for loosening stuck parts), should generally be avoided for lubricating kitchen tap components. Here’s why:
- Degradation of Rubber and Plastics: Petroleum-based lubricants can cause rubber and plastic materials to swell, soften, or degrade over time. This can lead to leaks and premature failure of tap components.
- Water Washout: Petroleum-based lubricants are not as water-resistant as silicone grease and can wash away easily with water exposure, requiring more frequent reapplication.
- Potential Contamination: Petroleum-based lubricants can potentially contaminate potable water, which is a concern for kitchen taps.
How to Apply Lubricant Correctly
Whether you’re using silicone grease or another type of lubricant, it’s important to apply it correctly to ensure optimal performance and prevent damage to your tap.
- Clean the Surfaces: Before applying lubricant, clean the surfaces to be lubricated with a clean cloth to remove any dirt, debris, or old lubricant.
- Apply a Thin, Even Coat: Apply a thin, even coat of lubricant to the O-rings, swivel joints, and other moving parts. Avoid applying too much lubricant, as this can attract dirt and debris.
- Work the Lubricant In: After applying the lubricant, work the moving parts back and forth to distribute the lubricant evenly and ensure it penetrates into all the crevices.
- Wipe Away Excess: Wipe away any excess lubricant with a clean cloth to prevent it from attracting dirt and debris.
When to Call a Plumber
While many stuck tap handle issues can be resolved with DIY troubleshooting and repair, there are certain situations where it’s best to call a professional plumber:
- You’re not comfortable with plumbing repairs: If you’re not confident in your ability to disassemble and reassemble the tap, it’s best to leave it to a professional.
- The tap is severely corroded: If the tap is heavily corroded, it may be difficult to disassemble without damaging it further. A plumber can assess the situation and determine if the tap needs to be replaced.
- You can’t identify the cause of the problem: If you’ve tried troubleshooting and lubricating the tap, but the handle is still stuck, there may be a more complex issue that requires professional diagnosis.
- You’re experiencing leaks: If you notice any leaks around the tap, it’s important to call a plumber to prevent water damage.
Navigating the World of Kitchen Tap Brands
When it comes to kitchen taps, several brands have established themselves as leaders in quality, innovation, and design. Understanding these brands and their offerings can help you make an informed decision when replacing or upgrading your kitchen tap.
Grohe: German Engineering at Its Finest
Grohe is a German manufacturer renowned for its precision engineering, innovative technologies, and sleek designs. Their taps are known for their durability, reliability, and smooth operation. Grohe offers a wide range of kitchen taps, including mixer taps, pull-out taps, and touchless taps.
Kohler: American Innovation and Style
Kohler is an American brand that has been a leader in plumbing fixtures for over a century. Their taps are known for their innovative features, stylish designs, and high-quality materials. Kohler offers a wide range of kitchen taps, including single-handle taps, two-handle taps, and bar taps.
Delta: Water-Saving Technology and Performance
Delta is an American brand that is known for its water-saving technologies and high-performance taps. Their taps are designed to reduce water consumption without sacrificing water pressure or performance. Delta offers a wide range of kitchen taps, including single-handle taps, two-handle taps, and touchless taps.
Moen: Reliability and Affordability
Moen is another popular American brand known for its reliable and affordable kitchen taps. Their taps are designed to be durable, easy to install, and easy to use. Moen offers a wide range of kitchen taps, including single-handle taps, two-handle taps, and pull-down taps.
Maintaining a Smooth-Swiveling Kitchen Tap
A kitchen tap that won’t swivel can be a frustrating inconvenience, but with a little knowledge and effort, you can often resolve the issue yourself. Remember to start with the simplest solutions, like lubrication, and work your way up to more complex repairs if necessary. And if you’re ever unsure or uncomfortable with a repair, don’t hesitate to call a professional plumber. Regular maintenance and preventative measures can go a long way in keeping your kitchen tap working smoothly for years to come. By choosing the right tap, performing regular maintenance, and addressing issues promptly, you can ensure that your kitchen tap remains a functional and aesthetically pleasing part of your kitchen for years to come.
