
How to Fix Leaky Kitchen Faucet Single Handle: A Step-by-Step Guide
Is that incessant drip, drip, drip driving you crazy? A leaky kitchen faucet, especially a single handle model, is a common household annoyance that can waste water and increase your bills. But don’t despair! Fixing it yourself is often a straightforward process that can save you money on plumber fees. This comprehensive guide will walk you through every step, from diagnosing the problem to replacing worn parts, ensuring you can confidently tackle this DIY project. We’ll cover everything from identifying the faucet type to troubleshooting common issues, providing you with the knowledge and skills to restore your faucet to perfect working order. Get ready to say goodbye to that annoying drip!
Understanding Single Handle Faucets and Their Common Problems
Single handle kitchen faucets are popular for their ease of use and sleek design. They control both water flow and temperature with a single lever, making them convenient for everyday tasks. However, this simplicity can sometimes mask underlying complexity. Leaks in these faucets often stem from worn-out or damaged internal components. Understanding these components is the first step toward a successful repair.
The most common types of single handle faucets are:
- Ball Faucets: An older design known for its durability, ball faucets use a slotted ball to control water flow. Leaks often occur due to worn-out springs and rubber seats within the faucet body.
- Cartridge Faucets: These faucets use a cartridge, a cylindrical valve, to regulate water flow. Leaks usually result from a cracked or worn cartridge. They are favored for their smooth operation.
- Ceramic Disc Faucets: Considered the most reliable type, ceramic disc faucets employ two ceramic discs that slide over each other to control water flow. Leaks are less common but can occur due to mineral buildup or damaged discs.
Common causes of leaks in single handle kitchen faucets include:
- Worn-out O-rings and Seals: These rubber components provide a watertight seal between faucet parts and degrade over time.
- Corroded Valve Seats: Mineral buildup and corrosion can damage the valve seats, preventing a tight seal.
- Loose or Damaged Cartridges: Cartridges can crack or become loose, leading to leaks around the handle base.
- High Water Pressure: Excessive water pressure can put stress on faucet components, accelerating wear and tear.
Tools and Materials You’ll Need to Fix a Leaky Faucet
Before you begin, gather the necessary tools and materials. Having everything on hand will make the repair process smoother and more efficient. Here’s a comprehensive list:
- Adjustable Wrench: For loosening and tightening nuts and fittings.
- Phillips and Flathead Screwdrivers: To remove handles and access internal components.
- Allen Wrench Set: Some faucets use Allen screws to secure the handle.
- Pliers: For gripping and manipulating small parts.
- Basin Wrench: To reach nuts in tight spaces under the sink.
- Penetrating Oil: To loosen stubborn nuts and screws.
- White Vinegar: For cleaning mineral deposits.
- Replacement Parts: O-rings, cartridges, valve seats, and other components specific to your faucet model. It’s best to have these ready before you disassemble the faucet.
- Plumber’s Grease: To lubricate O-rings and cartridges for smooth operation and a better seal.
- Clean Rags or Sponges: To wipe up spills and clean parts.
- Bucket: To catch any water that may spill during the repair.
- Flashlight or Headlamp: To provide better visibility in dark areas under the sink.
Step-by-Step Guide to Repairing a Leaky Single Handle Kitchen Faucet
Follow these steps carefully to diagnose and fix your leaky faucet. Remember to turn off the water supply before you begin!
Step 1: Turn Off the Water Supply
Locate the shut-off valves under your kitchen sink. There should be one for hot water and one for cold water. Turn both valves clockwise until they are completely closed. If you don’t have shut-off valves under the sink, you’ll need to turn off the main water supply to your house. Make sure everyone in the household knows the water will be off.
Step 2: Identify Your Faucet Type
As mentioned earlier, single handle faucets come in three main types: ball, cartridge, and ceramic disc. Examine your faucet closely to determine which type you have. The handle design and how it moves can often give you a clue. If you’re unsure, consult the faucet’s manual or the manufacturer’s website.
Step 3: Disassemble the Faucet
For Ball Faucets:
- Use an Allen wrench to loosen the set screw on the side of the handle.
- Remove the handle.
- Unscrew the cap and collar.
- Carefully lift out the ball and examine it for damage.
- Use a specialized wrench or pliers to remove the valve seats and springs.
For Cartridge Faucets:
- Pry off the decorative cap on the handle.
- Remove the screw underneath the cap.
- Pull the handle straight up to remove it.
- Use pliers to remove the retaining clip that holds the cartridge in place.
- Pull the cartridge straight up to remove it.
For Ceramic Disc Faucets:
- Pry off the decorative cap on the handle.
- Remove the screw underneath the cap.
- Lift the handle straight up.
- Remove the cylinder cap.
- Carefully lift out the ceramic disc cylinder.
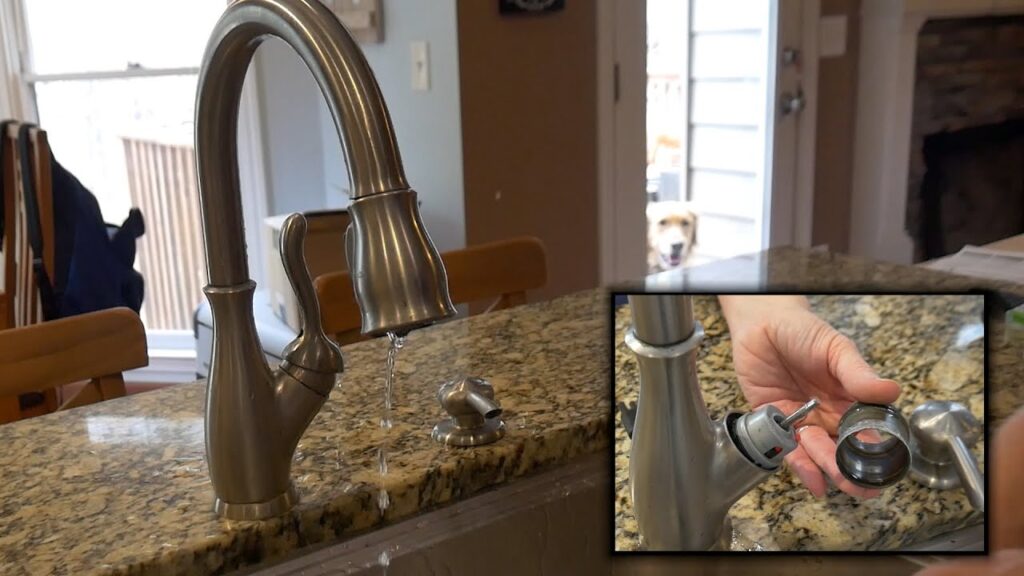
Step 4: Inspect and Replace Worn Parts
Once you’ve disassembled the faucet, carefully inspect all the parts for wear, corrosion, or damage. Pay close attention to O-rings, seals, valve seats, and the cartridge or ball. Replace any parts that show signs of wear or damage. It’s often a good idea to replace all the O-rings and seals at the same time, even if they don’t appear to be damaged, as they are likely nearing the end of their lifespan.
Step 5: Clean the Faucet Components
Before reassembling the faucet, clean all the parts thoroughly with white vinegar to remove any mineral deposits. Use a soft brush or cloth to scrub away stubborn buildup. Rinse the parts with clean water and dry them completely. Cleaning the parts will help ensure a good seal and prevent future leaks.
Step 6: Reassemble the Faucet
Follow the disassembly steps in reverse order to reassemble the faucet. Be sure to lubricate all O-rings and cartridges with plumber’s grease before installing them. This will help them slide into place smoothly and create a watertight seal. Tighten all nuts and screws securely, but be careful not to overtighten them, as this could damage the parts.
Step 7: Turn on the Water Supply and Test for Leaks
Slowly turn on the water supply valves under the sink. Check for leaks around the faucet base, handle, and spout. If you see any leaks, turn off the water supply again and re-examine the faucet assembly. Make sure all parts are properly seated and tightened.
Troubleshooting Common Leaks and Issues
Even after following these steps, you might still encounter some issues. Here are some common problems and how to address them:
- Leak at the Base of the Faucet: This usually indicates a problem with the O-rings or seals at the base of the faucet body. Replace these parts to stop the leak.
- Leak Around the Handle: This is often caused by a worn-out cartridge or O-ring on the cartridge. Replacing the cartridge is usually the best solution.
- Dripping Spout: This can be caused by a damaged valve seat, a worn-out cartridge, or mineral buildup in the spout. Try cleaning the spout first. If that doesn’t work, replace the valve seat or cartridge.
- Low Water Pressure: This could be due to mineral buildup in the aerator or the faucet body. Clean the aerator and flush the faucet to remove any debris.
- Stiff Handle Movement: This is usually caused by a lack of lubrication. Apply plumber’s grease to the cartridge or ball to improve handle movement.
Choosing the Right Replacement Parts
Selecting the correct replacement parts is crucial for a successful faucet repair. Here’s what you need to consider:
- Faucet Brand and Model: Knowing the brand and model of your faucet will help you find the correct replacement parts. Look for a stamp or label on the faucet body or handle.
- Part Numbers: If possible, find the part numbers for the components you need to replace. This will ensure you get the exact match.
- Quality of Parts: Choose high-quality replacement parts from reputable manufacturers. Cheap parts may not last as long and could cause further problems.
- Compatibility: Make sure the replacement parts are compatible with your faucet type. For example, a cartridge for a ceramic disc faucet will not work in a ball faucet.
When to Call a Plumber
While many faucet repairs are straightforward, there are times when it’s best to call a professional plumber. Consider hiring a plumber if:
- You’re not comfortable working with plumbing.
- You can’t identify the source of the leak.
- You’ve tried to fix the leak yourself, but it’s still persisting.
- The faucet is severely corroded or damaged.
- You encounter any unexpected problems during the repair.
Preventing Future Leaks: Maintenance Tips
Preventing leaks is always better than fixing them. Here are some tips to keep your single handle kitchen faucet in good working order:
- Regular Cleaning: Clean your faucet regularly with a mild soap and water solution to remove mineral deposits and grime.
- Proper Lubrication: Lubricate the cartridge or ball with plumber’s grease every year or two to keep the handle moving smoothly.
- Avoid Excessive Force: Don’t force the handle when turning it on or off. This can damage the internal components.
- Check Water Pressure: Make sure your water pressure is within the recommended range (40-60 psi). High water pressure can damage faucets and other plumbing fixtures.
- Address Leaks Promptly: Don’t ignore small leaks. Fix them as soon as you notice them to prevent further damage.
Single Handle Faucet Repair: A Worthwhile DIY Project
Fixing a leaky single handle kitchen faucet is a manageable DIY project that can save you money and prevent water waste. By understanding the different types of faucets, identifying the source of the leak, and following these step-by-step instructions, you can confidently tackle this common household repair. Remember to use high-quality replacement parts and take your time to ensure a successful outcome. With a little patience and effort, you can stop that annoying drip and restore your faucet to perfect working order. Addressing small plumbing issues promptly can extend the lifespan of your fixtures and prevent costlier repairs down the road.
