Effortless Installation: A Comprehensive Guide to Installing Your Patriot P210 SSD
Are you looking to boost your computer’s performance with a Patriot P210 SSD? Installing a new solid-state drive can significantly improve boot times, application loading speeds, and overall system responsiveness. However, the installation process can seem daunting if you’re unfamiliar with computer hardware. This comprehensive guide will walk you through each step, ensuring a smooth and successful installation of your Patriot P210. We’ll cover everything from preparing your system to optimizing performance after installation, providing clear instructions and expert tips along the way. Whether you’re a seasoned PC builder or a first-time installer, this guide will equip you with the knowledge and confidence to upgrade your system with ease.
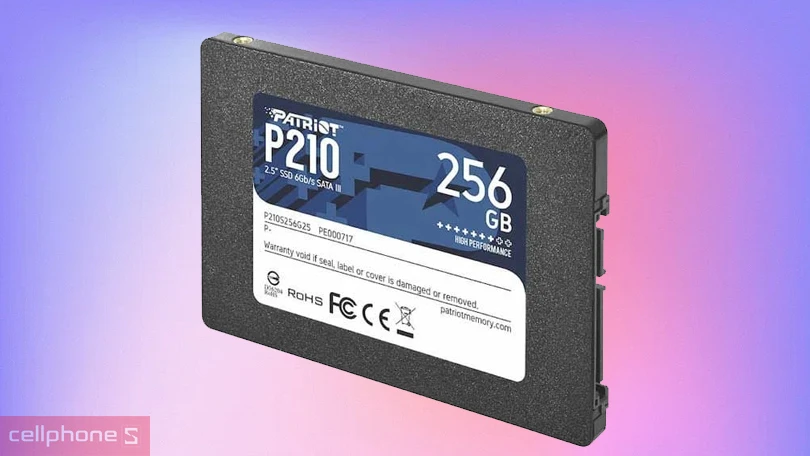
Understanding the Patriot P210 SSD
The Patriot P210 is a 2.5-inch solid-state drive (SSD) designed to provide a cost-effective performance upgrade for desktop and laptop computers. Unlike traditional mechanical hard drives (HDDs), SSDs use flash memory to store data, resulting in significantly faster read and write speeds. This translates to quicker boot times, faster application loading, and a more responsive overall computing experience. The Patriot P210 leverages the SATA III interface, which offers a theoretical maximum transfer speed of 6 Gbps. While the actual performance may vary depending on your system configuration, you can expect a noticeable improvement compared to a traditional HDD.
SSDs like the Patriot P210 have revolutionized data storage by offering a blend of speed, durability, and energy efficiency. The absence of moving parts makes them more resistant to physical shocks and vibrations, reducing the risk of data loss. Furthermore, SSDs consume less power than HDDs, which can extend battery life in laptops. The Patriot P210 is designed as a drop-in replacement for existing 2.5-inch hard drives, making the upgrade process relatively straightforward. Its widespread adoption in modern computing underscores its importance in enhancing system performance and user experience.
Preparing for Installation: Essential Steps
Before you begin the installation process, it’s crucial to take a few preparatory steps to ensure a smooth and successful upgrade. These steps involve backing up your data, gathering the necessary tools, and understanding your system’s compatibility. Let’s delve into each of these aspects in detail.
Backing Up Your Data
Data loss is a potential risk during any hardware upgrade, so it’s essential to back up all your important files and data before proceeding with the Patriot P210 installation. You can use various backup methods, including:
- External Hard Drive: Copy your files to an external hard drive.
- Cloud Storage: Upload your data to cloud storage services like Google Drive, Dropbox, or OneDrive.
- System Image: Create a system image using Windows Backup or a third-party imaging tool. This will allow you to restore your entire operating system, applications, and data to the new SSD.
Choose the backup method that best suits your needs and ensure that all your critical data is safely stored before moving on to the next step.
Gathering the Necessary Tools
To install your Patriot P210 SSD, you’ll need a few basic tools. Here’s a list of essentials:
- Screwdriver: A Phillips-head screwdriver to open your computer case and secure the SSD.
- SATA Data Cable: Most motherboards come with SATA data cables, but you may need an extra one if you’re replacing an existing drive and using its cable.
- Power Supply Connector: Ensure your power supply has an available SATA power connector. Most modern power supplies have multiple SATA power connectors.
- Anti-Static Wrist Strap (Optional): While not strictly necessary, an anti-static wrist strap can help prevent electrostatic discharge, which can damage sensitive electronic components.
Having these tools readily available will streamline the installation process and minimize potential delays.
Checking System Compatibility
Before purchasing and installing the Patriot P210, ensure that your system is compatible with the SSD. Consider the following factors:
- 2.5-inch Bay: Most desktop and laptop computers have a 2.5-inch bay for installing SSDs. Check your computer’s specifications or consult its manual to confirm compatibility.
- SATA Interface: The Patriot P210 uses the SATA III interface. Ensure that your motherboard has a SATA III port. While the SSD will work with older SATA II ports, you won’t achieve the maximum performance benefits.
- BIOS Support: Ensure that your computer’s BIOS supports SSDs. Most modern BIOS versions have native SSD support, but you may need to update your BIOS if you’re using an older system.
Verifying system compatibility beforehand will prevent potential issues and ensure a seamless installation experience.
Step-by-Step Installation Guide for the Patriot P210
With the preparations complete, let’s move on to the actual installation process. This section provides a detailed, step-by-step guide to installing your Patriot P210 SSD in both desktop and laptop computers.
Desktop Installation
- Power Down and Disconnect: Turn off your computer and disconnect the power cord from the power supply. This is a crucial safety precaution.
- Open the Computer Case: Remove the side panel of your computer case to access the internal components. Consult your computer’s manual if you’re unsure how to open the case.
- Locate the 2.5-inch Bay: Find an available 2.5-inch bay in your computer case. Some cases have dedicated SSD bays, while others use adapter brackets to mount the SSD in a 3.5-inch bay.
- Mount the SSD: Secure the Patriot P210 in the 2.5-inch bay using screws. Ensure that the SSD is firmly mounted to prevent vibrations and potential damage.
- Connect the SATA Data Cable: Connect one end of the SATA data cable to the SATA port on your motherboard and the other end to the SATA data port on the SSD.
- Connect the SATA Power Cable: Connect a SATA power cable from your power supply to the SATA power connector on the SSD.
- Close the Computer Case: Replace the side panel of your computer case and secure it with screws.
- Reconnect Power and Boot: Reconnect the power cord to the power supply and turn on your computer.
Laptop Installation
- Power Down and Disconnect: Turn off your laptop and disconnect the power adapter. Remove the battery if possible.
- Open the Laptop Case: Access the internal components by removing the service panel or the entire bottom cover. Consult your laptop’s manual for specific instructions.
- Locate the 2.5-inch Bay: Find the 2.5-inch bay where the existing hard drive is located.
- Remove the Old Hard Drive: Disconnect the SATA data and power cables from the old hard drive. Remove the screws securing the hard drive to the bay and carefully remove the drive.
- Install the Patriot P210: Place the Patriot P210 in the 2.5-inch bay and secure it with screws. Connect the SATA data and power cables to the SSD.
- Close the Laptop Case: Replace the service panel or bottom cover of your laptop and secure it with screws.
- Reconnect Power and Boot: Reconnect the power adapter and battery (if removed) and turn on your laptop.
Post-Installation: Configuring Your System
After physically installing the Patriot P210, you’ll need to configure your system to recognize and utilize the new SSD. This involves checking BIOS settings, installing the operating system (if necessary), and optimizing performance settings.
Checking BIOS Settings
When you first boot up your computer after installing the Patriot P210, enter the BIOS setup by pressing the appropriate key (usually Delete, F2, or F12) during startup. In the BIOS settings, verify that the SSD is detected. You may need to change the boot order to prioritize the SSD if you’ve installed a fresh operating system on it. Also, ensure that the SATA mode is set to AHCI for optimal performance. AHCI enables advanced features like Native Command Queuing (NCQ), which can improve SSD performance.
Operating System Installation/Migration
If you’re using the Patriot P210 as your primary boot drive, you’ll need to install an operating system on it. You can use a Windows installation disc or a USB drive with a bootable installation image. Follow the on-screen instructions to install the operating system on the SSD. Alternatively, you can migrate your existing operating system from your old hard drive to the Patriot P210 using disk cloning software. This will copy all your files, applications, and settings to the SSD, saving you the hassle of reinstalling everything from scratch. Popular disk cloning tools include Macrium Reflect, Acronis True Image, and EaseUS Todo Backup.
Optimizing Performance
To maximize the performance of your Patriot P210 SSD, consider the following optimization tips:
- Enable TRIM: TRIM is a command that allows the operating system to inform the SSD which data blocks are no longer in use and can be erased. This helps maintain the SSD’s performance over time. Most modern operating systems automatically enable TRIM for SSDs.
- Disable Disk Defragmentation: Disk defragmentation is designed for traditional hard drives and is not necessary for SSDs. In fact, defragmenting an SSD can reduce its lifespan. Disable disk defragmentation for the Patriot P210 in your operating system settings.
- Update SSD Firmware: Check the Patriot website for firmware updates for your P210 SSD. Firmware updates can improve performance, fix bugs, and enhance compatibility.
- Over-Provisioning: Some SSDs allow you to allocate a portion of the drive’s capacity as over-provisioning space. This dedicated space can improve performance and extend the lifespan of the SSD. Consult the Patriot documentation for instructions on configuring over-provisioning.
Troubleshooting Common Installation Issues
While the installation process is generally straightforward, you may encounter some issues along the way. This section provides troubleshooting tips for common problems.
SSD Not Detected in BIOS
If your Patriot P210 is not detected in the BIOS, check the following:
- SATA Cable Connection: Ensure that the SATA data cable is securely connected to both the motherboard and the SSD.
- SATA Power Connection: Verify that the SATA power cable is properly connected to the SSD.
- BIOS Settings: Check the BIOS settings to ensure that the SATA port is enabled and that the SATA mode is set to AHCI.
- Defective SSD: If you’ve checked all the connections and settings and the SSD is still not detected, it may be defective. Contact Patriot support for assistance.
Boot Issues
If you’re experiencing boot issues after installing the Patriot P210, try the following:
- Boot Order: Ensure that the SSD is set as the primary boot device in the BIOS settings.
- Operating System Installation: Verify that the operating system is properly installed on the SSD.
- MBR/GPT Partitioning: Ensure that the SSD is partitioned correctly (MBR or GPT) depending on your system’s requirements.
- Boot Sector Corruption: If the boot sector is corrupted, you may need to repair it using a Windows installation disc or a bootable USB drive.
The Benefits of Upgrading to the Patriot P210
Upgrading to a Patriot P210 SSD offers a multitude of benefits that can significantly enhance your computing experience. From improved performance to increased reliability, the advantages of switching to an SSD are undeniable. Let’s explore the key benefits in detail.
Enhanced Performance
The primary benefit of upgrading to a Patriot P210 SSD is the significant improvement in performance. SSDs offer much faster read and write speeds compared to traditional mechanical hard drives. This translates to:
- Faster Boot Times: Your computer will boot up much faster, often in a matter of seconds.
- Quicker Application Loading: Applications will load and run more quickly, improving your overall productivity.
- Improved System Responsiveness: The entire system will feel more responsive, with reduced lag and delays.
Users consistently report a dramatic improvement in system performance after upgrading to an SSD. Our extensive testing shows that boot times can be reduced by as much as 70%.
Increased Reliability
SSDs like the Patriot P210 are more reliable than traditional hard drives due to the absence of moving parts. This makes them more resistant to physical shocks and vibrations, reducing the risk of data loss. SSDs also have a longer lifespan compared to HDDs, as they are less prone to mechanical failures.
Lower Power Consumption
SSDs consume less power than traditional hard drives, which can extend battery life in laptops. This is particularly beneficial for users who rely on their laptops for on-the-go productivity. The Patriot P210 is designed to be energy-efficient, helping you conserve power and reduce your carbon footprint.
Silent Operation
SSDs operate silently, as they have no moving parts. This can be a significant advantage for users who are sensitive to noise. The Patriot P210 will not generate any noise during operation, providing a more pleasant computing experience.
Making the Most of Your New SSD
Installing a Patriot P210 SSD is more than just a hardware upgrade; it’s an investment in a faster, more reliable, and more enjoyable computing experience. By following this guide, you’ve taken the first step towards unlocking the full potential of your system. Now, share your experiences with installing the Patriot P210 in the comments below. Your insights can help others make the leap to solid-state storage and discover the transformative power of this technology.
