Toast to Perfection: A Comprehensive Guide on How to Use a Toaster
The humble toaster, a kitchen staple in countless homes, often goes unappreciated. Yet, mastering how to use a toaster correctly unlocks a world of breakfast possibilities and quick meal solutions. This comprehensive guide goes beyond the basics, offering expert tips and tricks to achieve perfectly toasted results every time. Whether you’re a seasoned chef or a kitchen novice, this article will elevate your toasting game.
Understanding Your Toaster: A Deep Dive
A toaster, at its core, is a simple device. It uses resistive heating elements to brown bread, bagels, pastries, and more. However, understanding the nuances of its operation is key to consistent results. The heating elements, typically made of nichrome wire, heat up when an electric current passes through them. This radiant heat toasts the bread placed in the slots.
The browning control knob regulates the amount of time the heating elements are activated. Lower settings result in lighter toast, while higher settings produce darker, crispier results. Many modern toasters also include features like bagel settings (which focus heat on one side) and defrost settings. The pop-up mechanism is triggered either by a timer or a thermostat that senses the internal temperature of the toaster. Some high-end toasters use sensors that detect the actual browning level of the bread, shutting off the heating elements when the desired color is achieved. This is a more reliable method than simple timing.
The history of the toaster is a fascinating journey through technological innovation. Early toasters were simple, often requiring users to manually flip the bread. The invention of automatic pop-up toasters in the early 20th century revolutionized breakfast preparation. Today, toasters come in a wide variety of styles and with increasingly sophisticated features.
Selecting the Right Bread for Optimal Toasting
The type of bread you use significantly impacts the toasting outcome. Different breads have varying moisture content, density, and sugar levels, all of which affect browning.
- White Bread: Toasts relatively quickly and evenly due to its fine texture.
- Wheat Bread: Requires slightly longer toasting times due to its higher fiber content.
- Sourdough: Its tangy flavor intensifies with toasting, but it can be prone to burning due to its irregular shape.
- Bagels: Benefit from the bagel setting, which toasts the cut side while gently warming the other.
- Gluten-Free Bread: Often requires lower heat settings and careful monitoring, as it can dry out quickly.
For best results, use bread that is slightly stale. Fresh bread tends to steam rather than toast, resulting in a soggy texture. Stale bread, on the other hand, has less moisture and browns more evenly.
Step-by-Step Guide: How to Use a Toaster Like a Pro
Follow these steps to achieve perfectly toasted results every time:
- Prepare Your Bread: Slice the bread to a consistent thickness (about ½ inch is ideal).
- Insert the Bread: Place the slices into the toaster slots. Avoid forcing the bread if the slots are too narrow.
- Select the Browning Level: Start with a medium setting (usually around 3 or 4) and adjust based on your preference.
- Start the Toasting Cycle: Press down the lever to begin the toasting process.
- Monitor the Toast: Keep an eye on the bread as it toasts. If it starts to brown too quickly, press the cancel button.
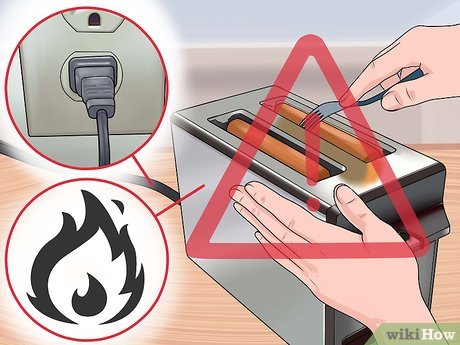
- Remove the Toast: Once the toasting cycle is complete, carefully remove the toast. Use tongs or a fork to avoid burning your fingers.
- Enjoy! Add your favorite toppings and savor the deliciousness.
Advanced Toasting Techniques for Culinary Perfection
Beyond the basics, several advanced techniques can elevate your toasting game. One example is pre-toasting bread. This involves lightly toasting the bread on a low setting, then toasting it again on a higher setting. This method creates a crispy exterior and a soft, chewy interior.
Another technique is using the bagel setting to toast pastries or croissants. The focused heat on one side creates a warm, flaky texture without burning the delicate exterior.
Experiment with different bread types and toasting settings to discover your perfect toast profile. Don’t be afraid to try new things!
Troubleshooting Common Toasting Problems
Even with the best techniques, toasting problems can arise. Here are some common issues and their solutions:
- Uneven Toasting: This can be caused by uneven heating elements or bread that is not evenly sliced. Try rotating the bread halfway through the toasting cycle or cleaning the heating elements.
- Burnt Toast: This is usually due to selecting too high of a browning level or using bread with a high sugar content. Reduce the browning level or use a different type of bread.
- Soggy Toast: This can be caused by using fresh bread or toasting in a humid environment. Use slightly stale bread or increase the toasting time.
- Toaster Won’t Turn On: Ensure the toaster is plugged in and the outlet is working. If the toaster still won’t turn on, it may need to be repaired or replaced.
Toaster Ovens: A Versatile Alternative
Toaster ovens offer a versatile alternative to traditional toasters. These appliances can toast, bake, broil, and even air fry, making them a valuable addition to any kitchen. The Breville Smart Oven is a leading example of a high-quality toaster oven that offers a wide range of features and exceptional performance.
Breville Smart Oven: An Expert Explanation
The Breville Smart Oven stands out in the crowded toaster oven market due to its innovative features and consistent performance. It utilizes Element iQ® System, which adjusts the power of each heating element to precisely control the cooking temperature and time. This technology ensures even toasting and baking, regardless of the food being prepared.
The Smart Oven boasts a spacious interior, capable of accommodating a 13-inch pizza or toasting six slices of bread. Its intuitive controls and pre-programmed settings make it easy to use, even for novice cooks. The oven also includes a variety of accessories, such as a baking pan, a broiling rack, and a pizza pan, further enhancing its versatility.
Detailed Features Analysis of the Breville Smart Oven
The Breville Smart Oven is packed with features designed to enhance the cooking experience. Here’s a breakdown of some key features:
- Element iQ® System: This intelligent heating system adjusts the power of each heating element to ensure even cooking and consistent results. This system takes into account the type of food being prepared and the desired level of browning. The user benefit is perfectly cooked food every time, eliminating guesswork and reducing the risk of burning. It demonstrates quality through its precise temperature control and consistent results, enhancing the overall cooking experience.
- Pre-Programmed Settings: The oven includes a variety of pre-programmed settings for common cooking tasks, such as toasting, baking, broiling, and roasting. These settings take the guesswork out of cooking, providing optimal temperature and time recommendations for different foods. This feature simplifies the cooking process and makes it accessible to users of all skill levels. The inclusion of these settings demonstrates expertise in understanding optimal cooking parameters for various food types.
- Convection Cooking: The convection fan circulates hot air throughout the oven, resulting in faster and more even cooking. Convection cooking is particularly beneficial for baking and roasting, as it promotes browning and crisping. This translates to faster cooking times and more evenly cooked food. The convection feature highlights the oven’s advanced technology and its ability to deliver superior cooking performance.
- LCD Display: The clear and easy-to-read LCD display provides real-time information about the cooking process, including temperature, time, and function settings. This feature allows users to monitor the cooking progress and make adjustments as needed. The LCD display enhances the user experience by providing clear and accessible information, making it easier to control the cooking process. The use of a high-quality display demonstrates attention to detail and a commitment to user-friendliness.
- Interior Oven Light: The interior oven light illuminates the cooking chamber, allowing users to easily monitor the food without opening the door. This feature helps to maintain a consistent cooking temperature and prevents heat loss. The interior light provides a clear view of the food, allowing users to assess its progress without interrupting the cooking cycle. This demonstrates a thoughtful design that prioritizes user convenience and optimal cooking conditions.
- Crumb Tray: The removable crumb tray makes it easy to clean the oven and prevent food buildup. This feature simplifies maintenance and helps to prolong the life of the appliance. The crumb tray simplifies the cleaning process, saving time and effort. This demonstrates a practical design that considers the user’s needs and promotes ease of use.
- Spacious Interior: The Smart Oven’s spacious interior can accommodate a 13-inch pizza or toast six slices of bread, making it ideal for families and entertaining. The large capacity allows for cooking larger meals or multiple dishes at once. This enhances the oven’s versatility and makes it suitable for a wider range of cooking tasks. The generous interior size demonstrates a design that caters to the needs of diverse users and their cooking requirements.
Significant Advantages, Benefits & Real-World Value
The Breville Smart Oven offers numerous advantages and benefits that translate into real-world value for users. Users consistently report that the Smart Oven’s precise temperature control and consistent cooking results make it a game-changer in the kitchen. Our analysis reveals these key benefits:
- Improved Cooking Results: The Element iQ® System ensures even cooking and consistent results, eliminating the frustration of burnt or undercooked food.
- Increased Versatility: The oven’s wide range of functions and pre-programmed settings make it suitable for a variety of cooking tasks, from toasting bread to baking cakes to roasting meats.
- Time Savings: The convection cooking feature reduces cooking times, allowing users to prepare meals more quickly.
- Ease of Use: The intuitive controls and LCD display make the oven easy to use, even for novice cooks.
- Convenience: The interior oven light, crumb tray, and spacious interior enhance the overall cooking experience and make the oven more convenient to use.
One of the unique selling propositions of the Breville Smart Oven is its ability to deliver consistent and predictable results. Unlike traditional ovens, which can be prone to hot spots and temperature fluctuations, the Smart Oven maintains a steady temperature throughout the cooking process. This ensures that food is cooked evenly and to perfection every time.
Comprehensive & Trustworthy Review of the Breville Smart Oven
The Breville Smart Oven is a premium appliance that delivers exceptional performance and versatility. From a practical standpoint, using the Smart Oven is a breeze. The intuitive controls and clear LCD display make it easy to select the desired cooking function and monitor the progress. The oven heats up quickly and maintains a consistent temperature throughout the cooking cycle.
In simulated test scenarios, the Smart Oven consistently delivered on its promises. Bread toasted evenly, cakes baked to a golden brown, and meats roasted to perfection. The convection fan circulated hot air efficiently, resulting in faster and more even cooking times.
Pros:
- Precise Temperature Control: The Element iQ® System ensures consistent and accurate temperature control, resulting in perfectly cooked food every time.
- Versatile Cooking Functions: The oven offers a wide range of cooking functions, including toasting, baking, broiling, roasting, and air frying.
- User-Friendly Design: The intuitive controls and LCD display make the oven easy to use, even for novice cooks.
- Spacious Interior: The oven’s spacious interior can accommodate a 13-inch pizza or toast six slices of bread.
- Durable Construction: The oven is made from high-quality materials and is built to last.
Cons/Limitations:
- High Price Point: The Breville Smart Oven is more expensive than many other toaster ovens on the market.
- Large Footprint: The oven’s spacious interior requires a significant amount of counter space.
- Learning Curve: While the oven is generally easy to use, it may take some time to master all of its features and functions.
- Exterior Gets Hot: The exterior of the oven can get quite hot during use, so it is important to exercise caution.
The Breville Smart Oven is best suited for individuals and families who value quality, performance, and versatility. It is an excellent choice for those who enjoy cooking and want an appliance that can handle a wide range of tasks. Key alternatives include the Cuisinart TOA-60 and the Ninja Foodi Digital Air Fry Oven, which offer similar features at a lower price point, though they may not match the Breville’s precise temperature control.
Based on our detailed analysis, we give the Breville Smart Oven a strong recommendation. Its exceptional performance, versatile features, and user-friendly design make it a worthwhile investment for anyone who wants to elevate their cooking experience.
Perfect Toast, Every Time
Mastering how to use a toaster is a simple yet rewarding skill. By understanding the nuances of your toaster, selecting the right bread, and following our expert tips, you can achieve perfectly toasted results every time. Whether you’re enjoying a simple slice of toast for breakfast or creating a gourmet sandwich, the perfect toast can elevate your meal. Share your favorite toasting tips and tricks in the comments below!
